Online Registration
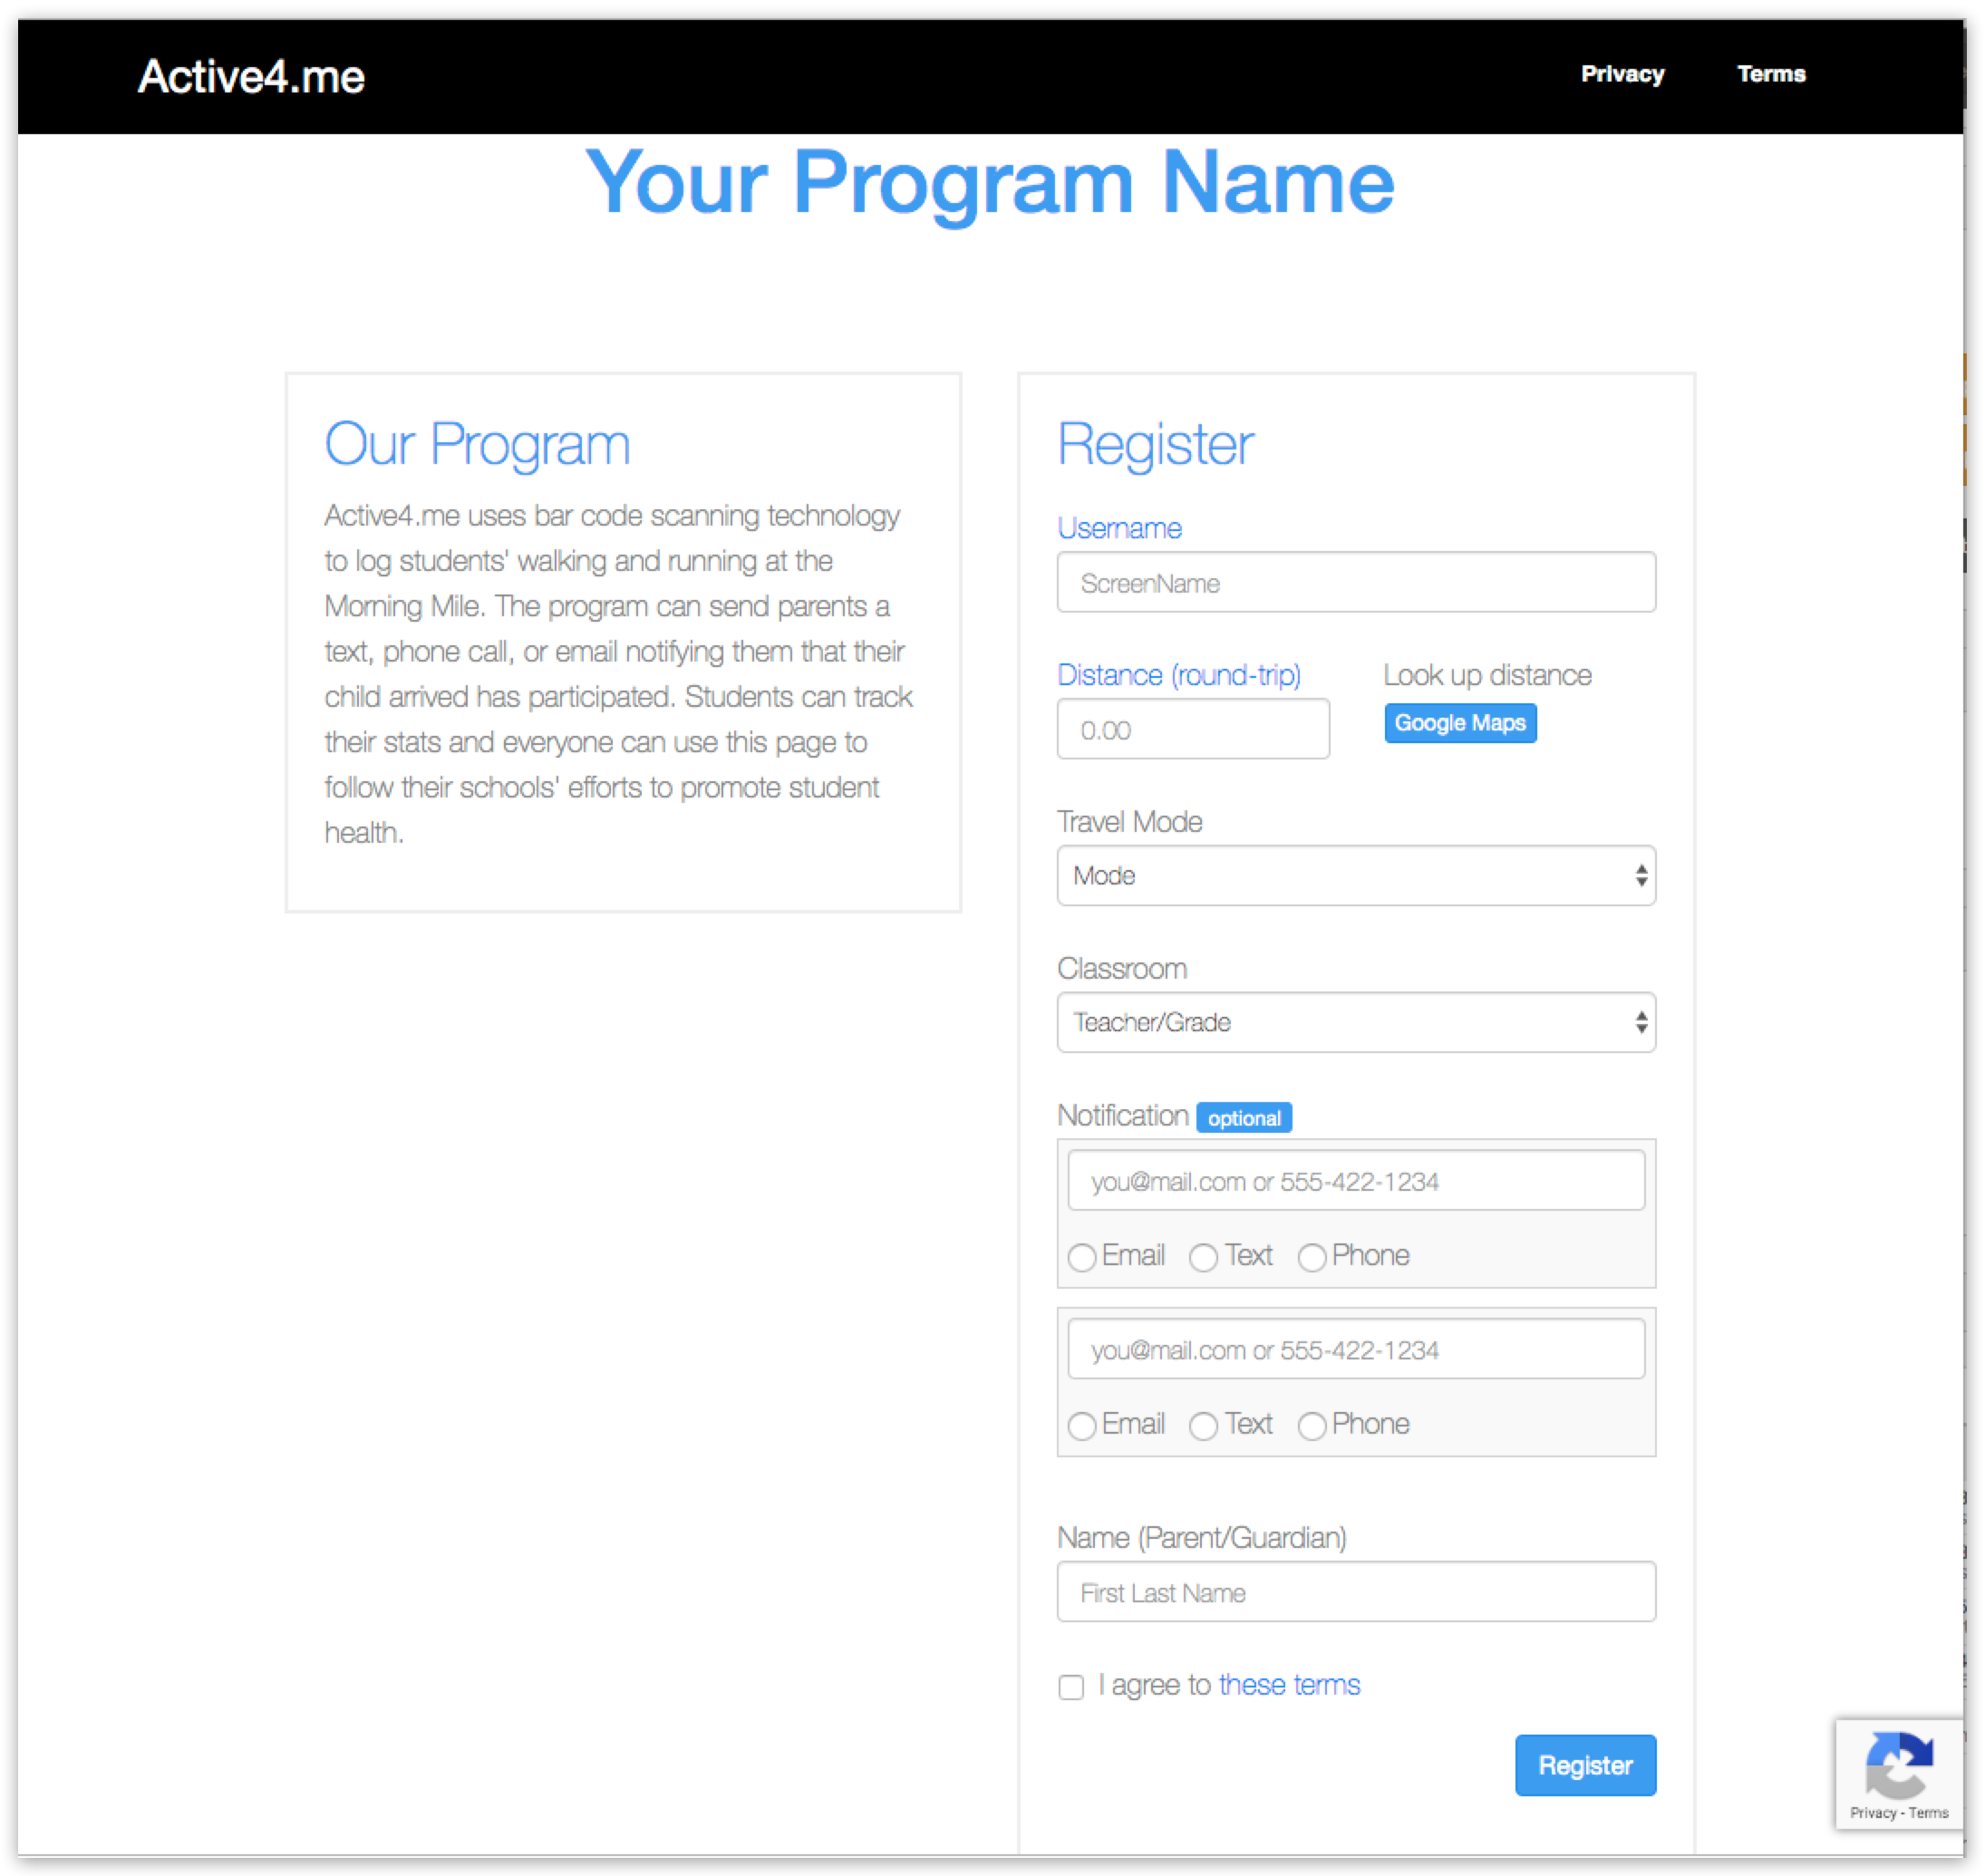
The above images is the form your parents/guardians will fill out.
View a live example here: https://www.active4.me/Registration/yourschoolname
Online registration is a great way to reduce data entry.
1. Login to Active4.me
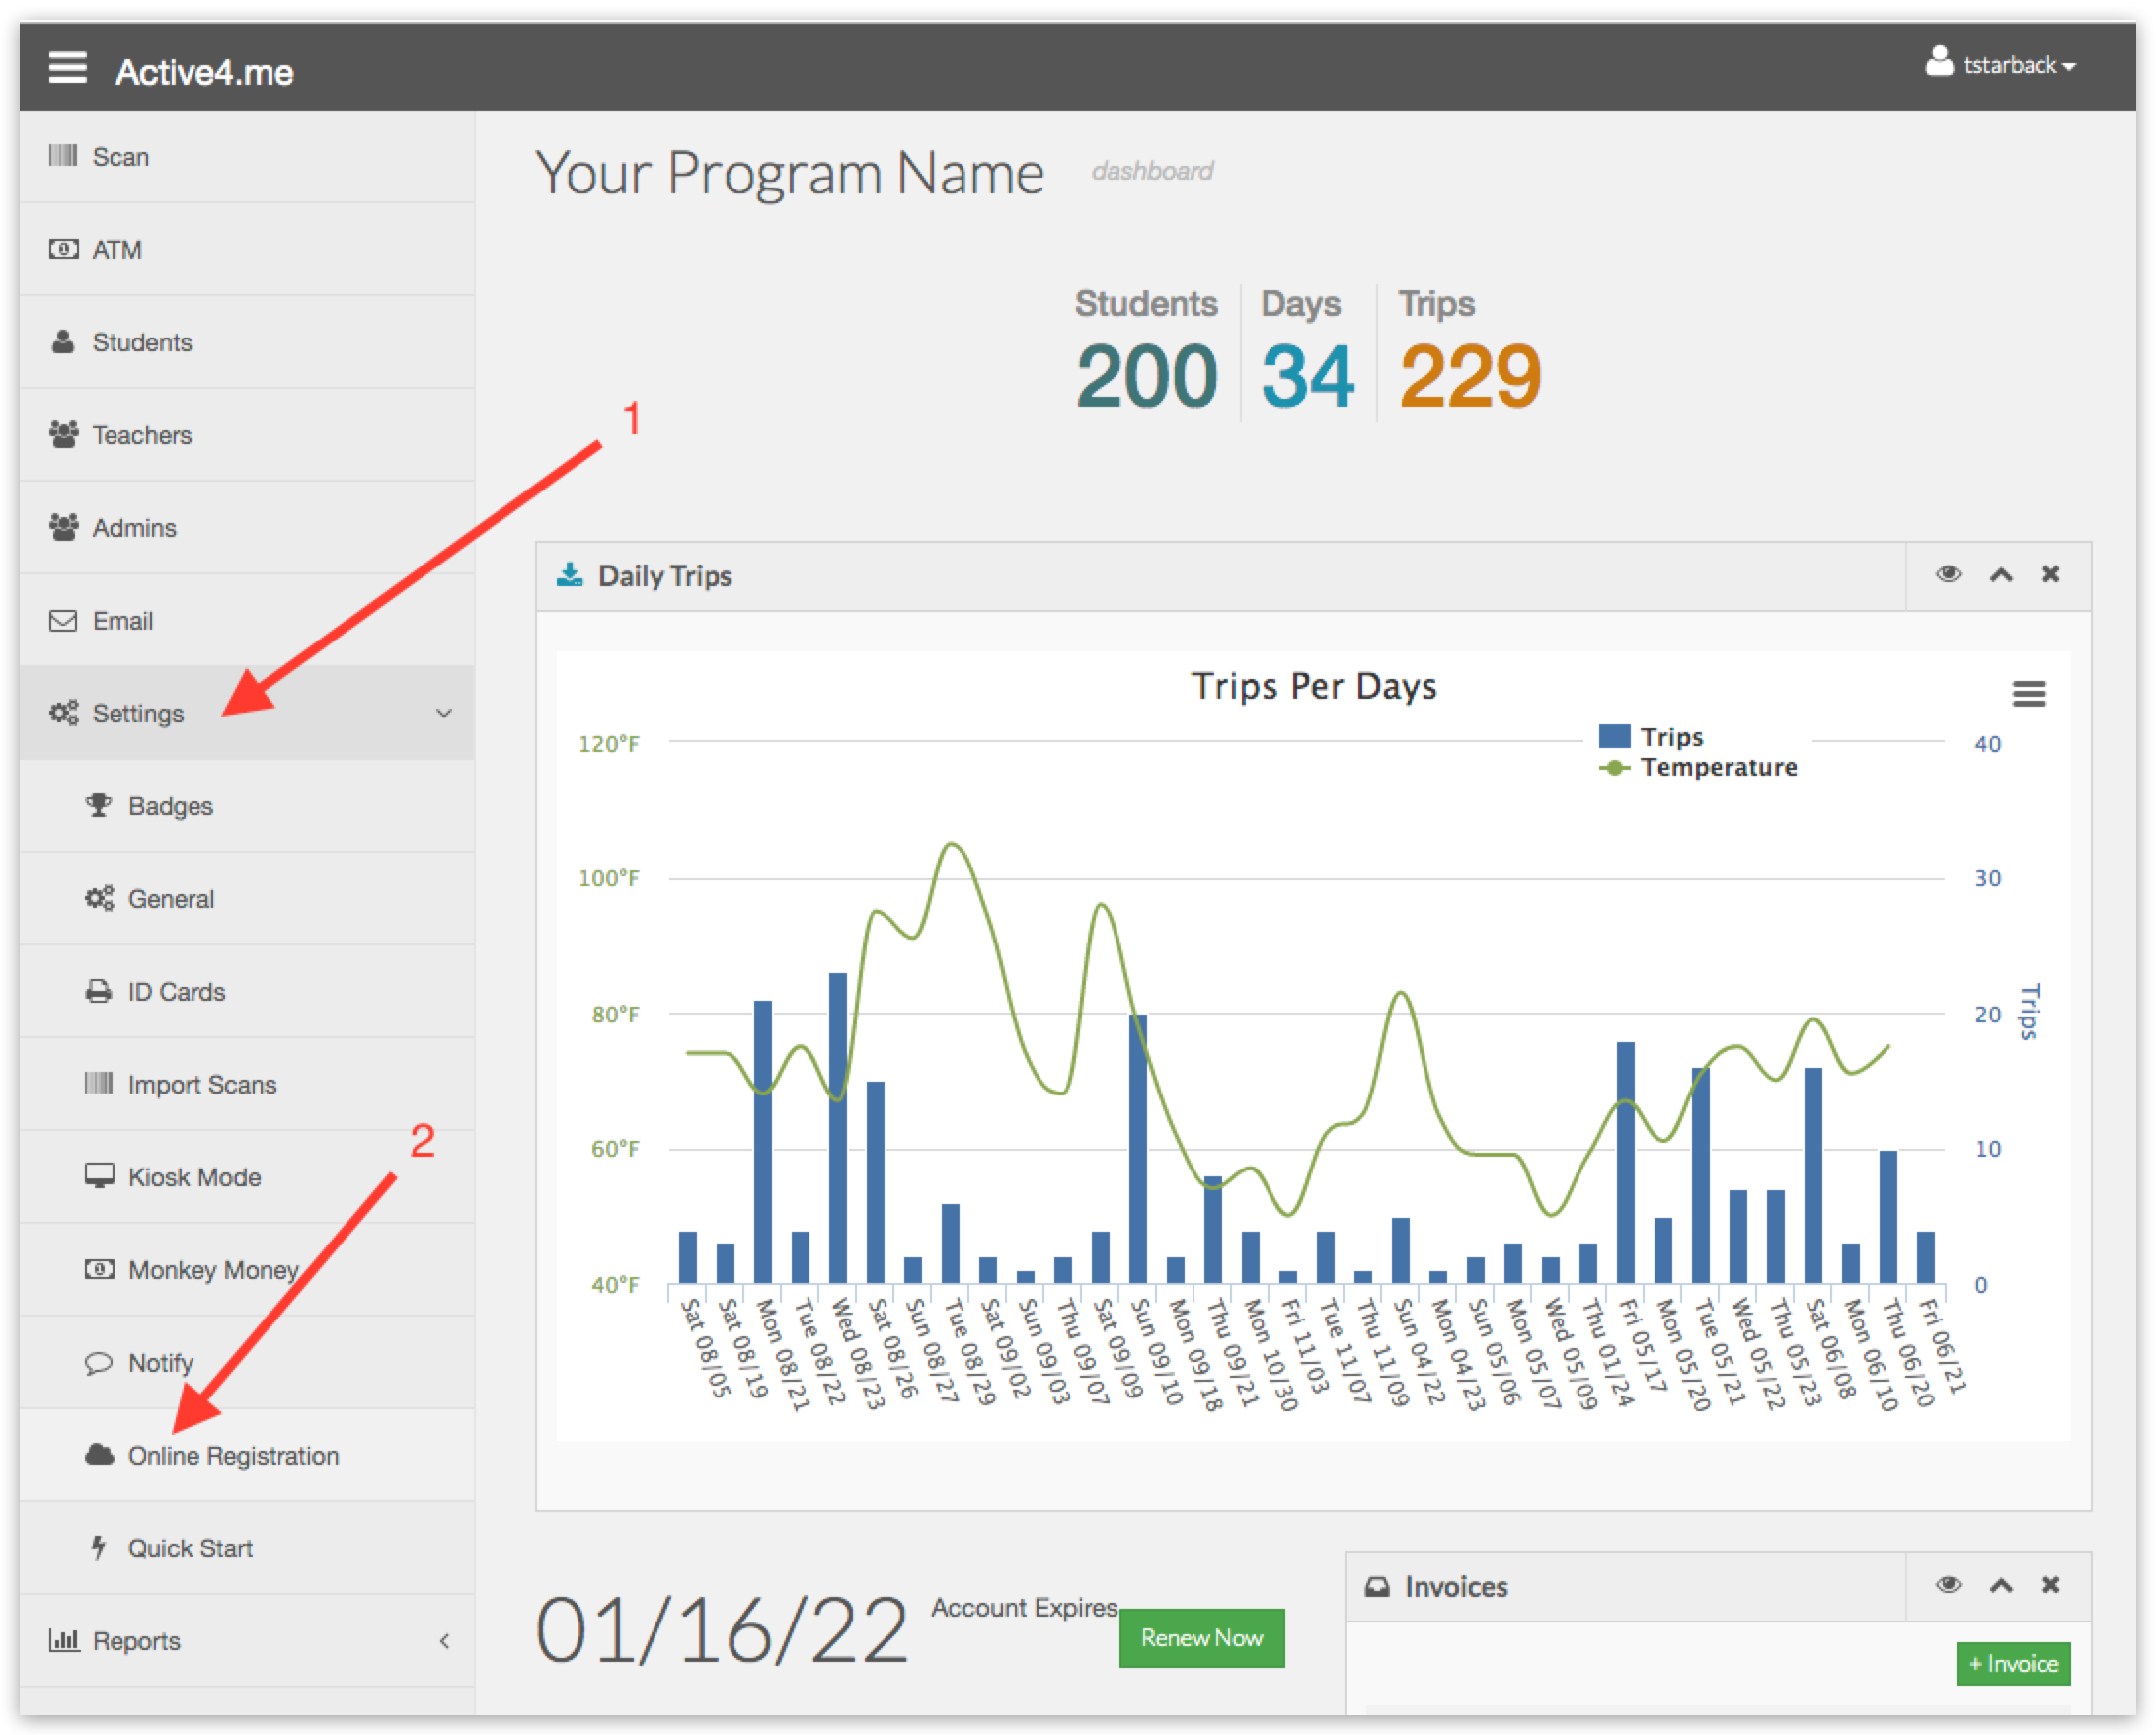
2. Click "Settings" in the sidebar.
3. Then click "Online Registration" in the expanded sidebar.
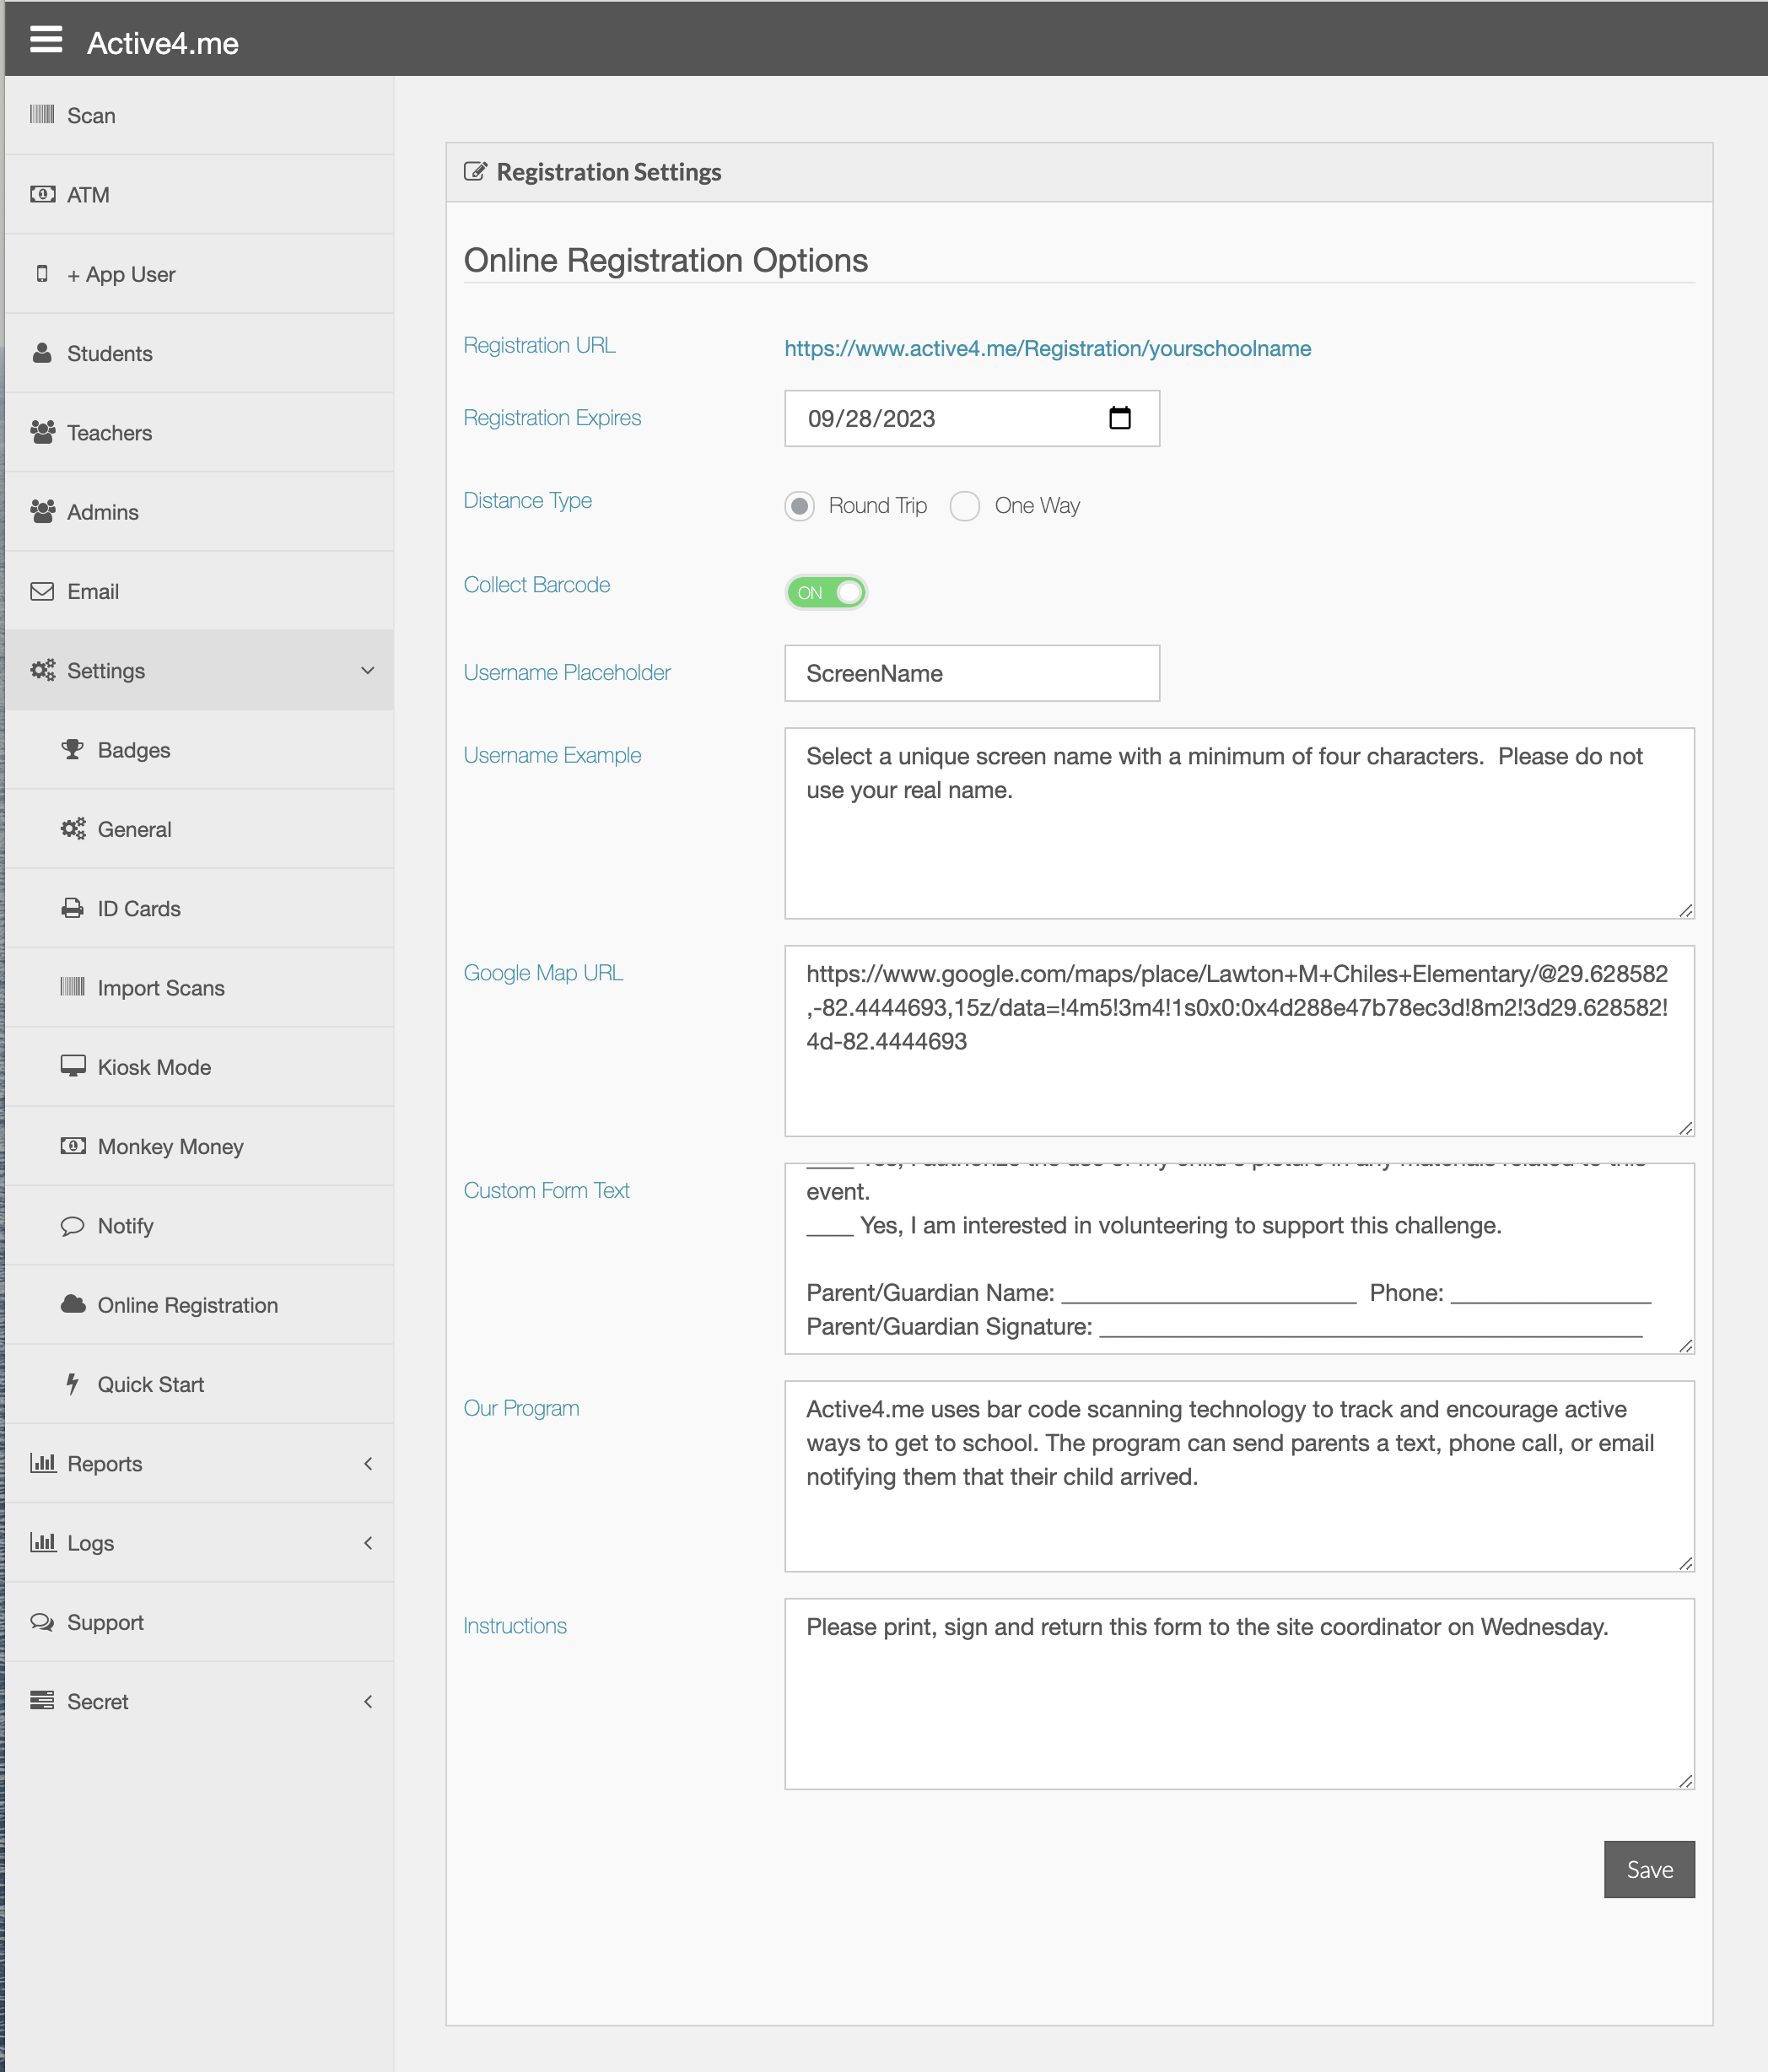
Registration URL: This is the public url for your online registration.
Registration Expires: Your registration form is enabled or disabled by this date setting. If you no longer need the online registration form, set the date to yesterday. To have it automatically expire, set the date to the last day you will accept registration.
Distance Type: An indicator that shows up in the form to let the parent know if you are looking for a round-trip distance or one way.
Collect Barcode: This adds a barcode number field to the registration form. Use this option if you have already distributed barcode numbers with Quick Start and want to give parents a way to opt-in to receive the notifications. When the form is received you can then convert any Quick Start trips into this new account with the correct mode and distance.
Username Placeholder: An example of how you want to collect student names. Some programs use the full student name and some prefers a screen name.
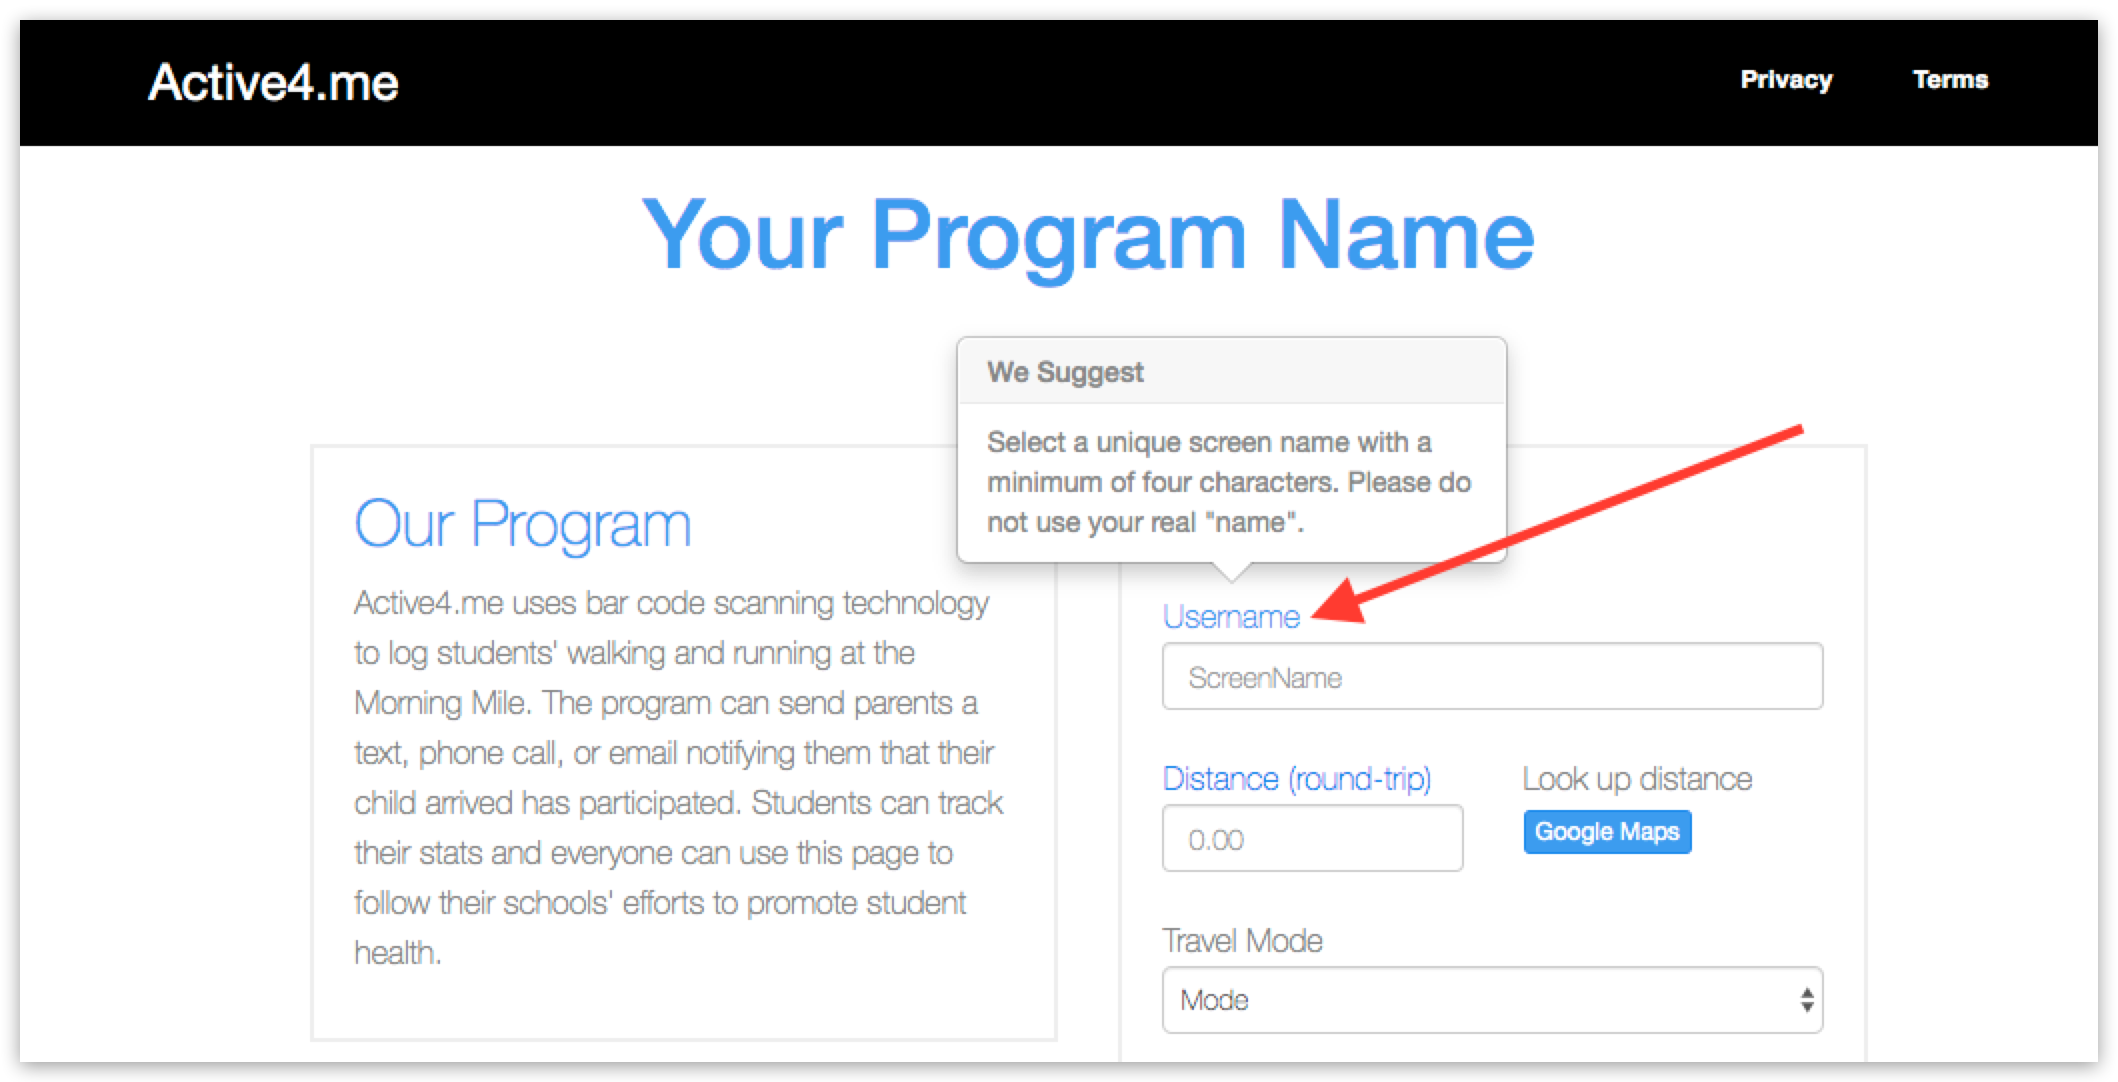
Username Example: This is the instructions shown when you hover the curser over the "Username"
Google Map URL: Link to Google Maps with the school address set. This URL opens a new browser window and enables the parent to get an accurate distance from their address to school. We do not store/request any home addresses.
Custom Form Text: Add your own form requirements here. These are added to the printed form.
Our Program: This in the information about your program that is shown to the left of your registration page.
Instructions: After the form is completed, this information lets them know what to do with the signed from.

Example of the form that will be returned.
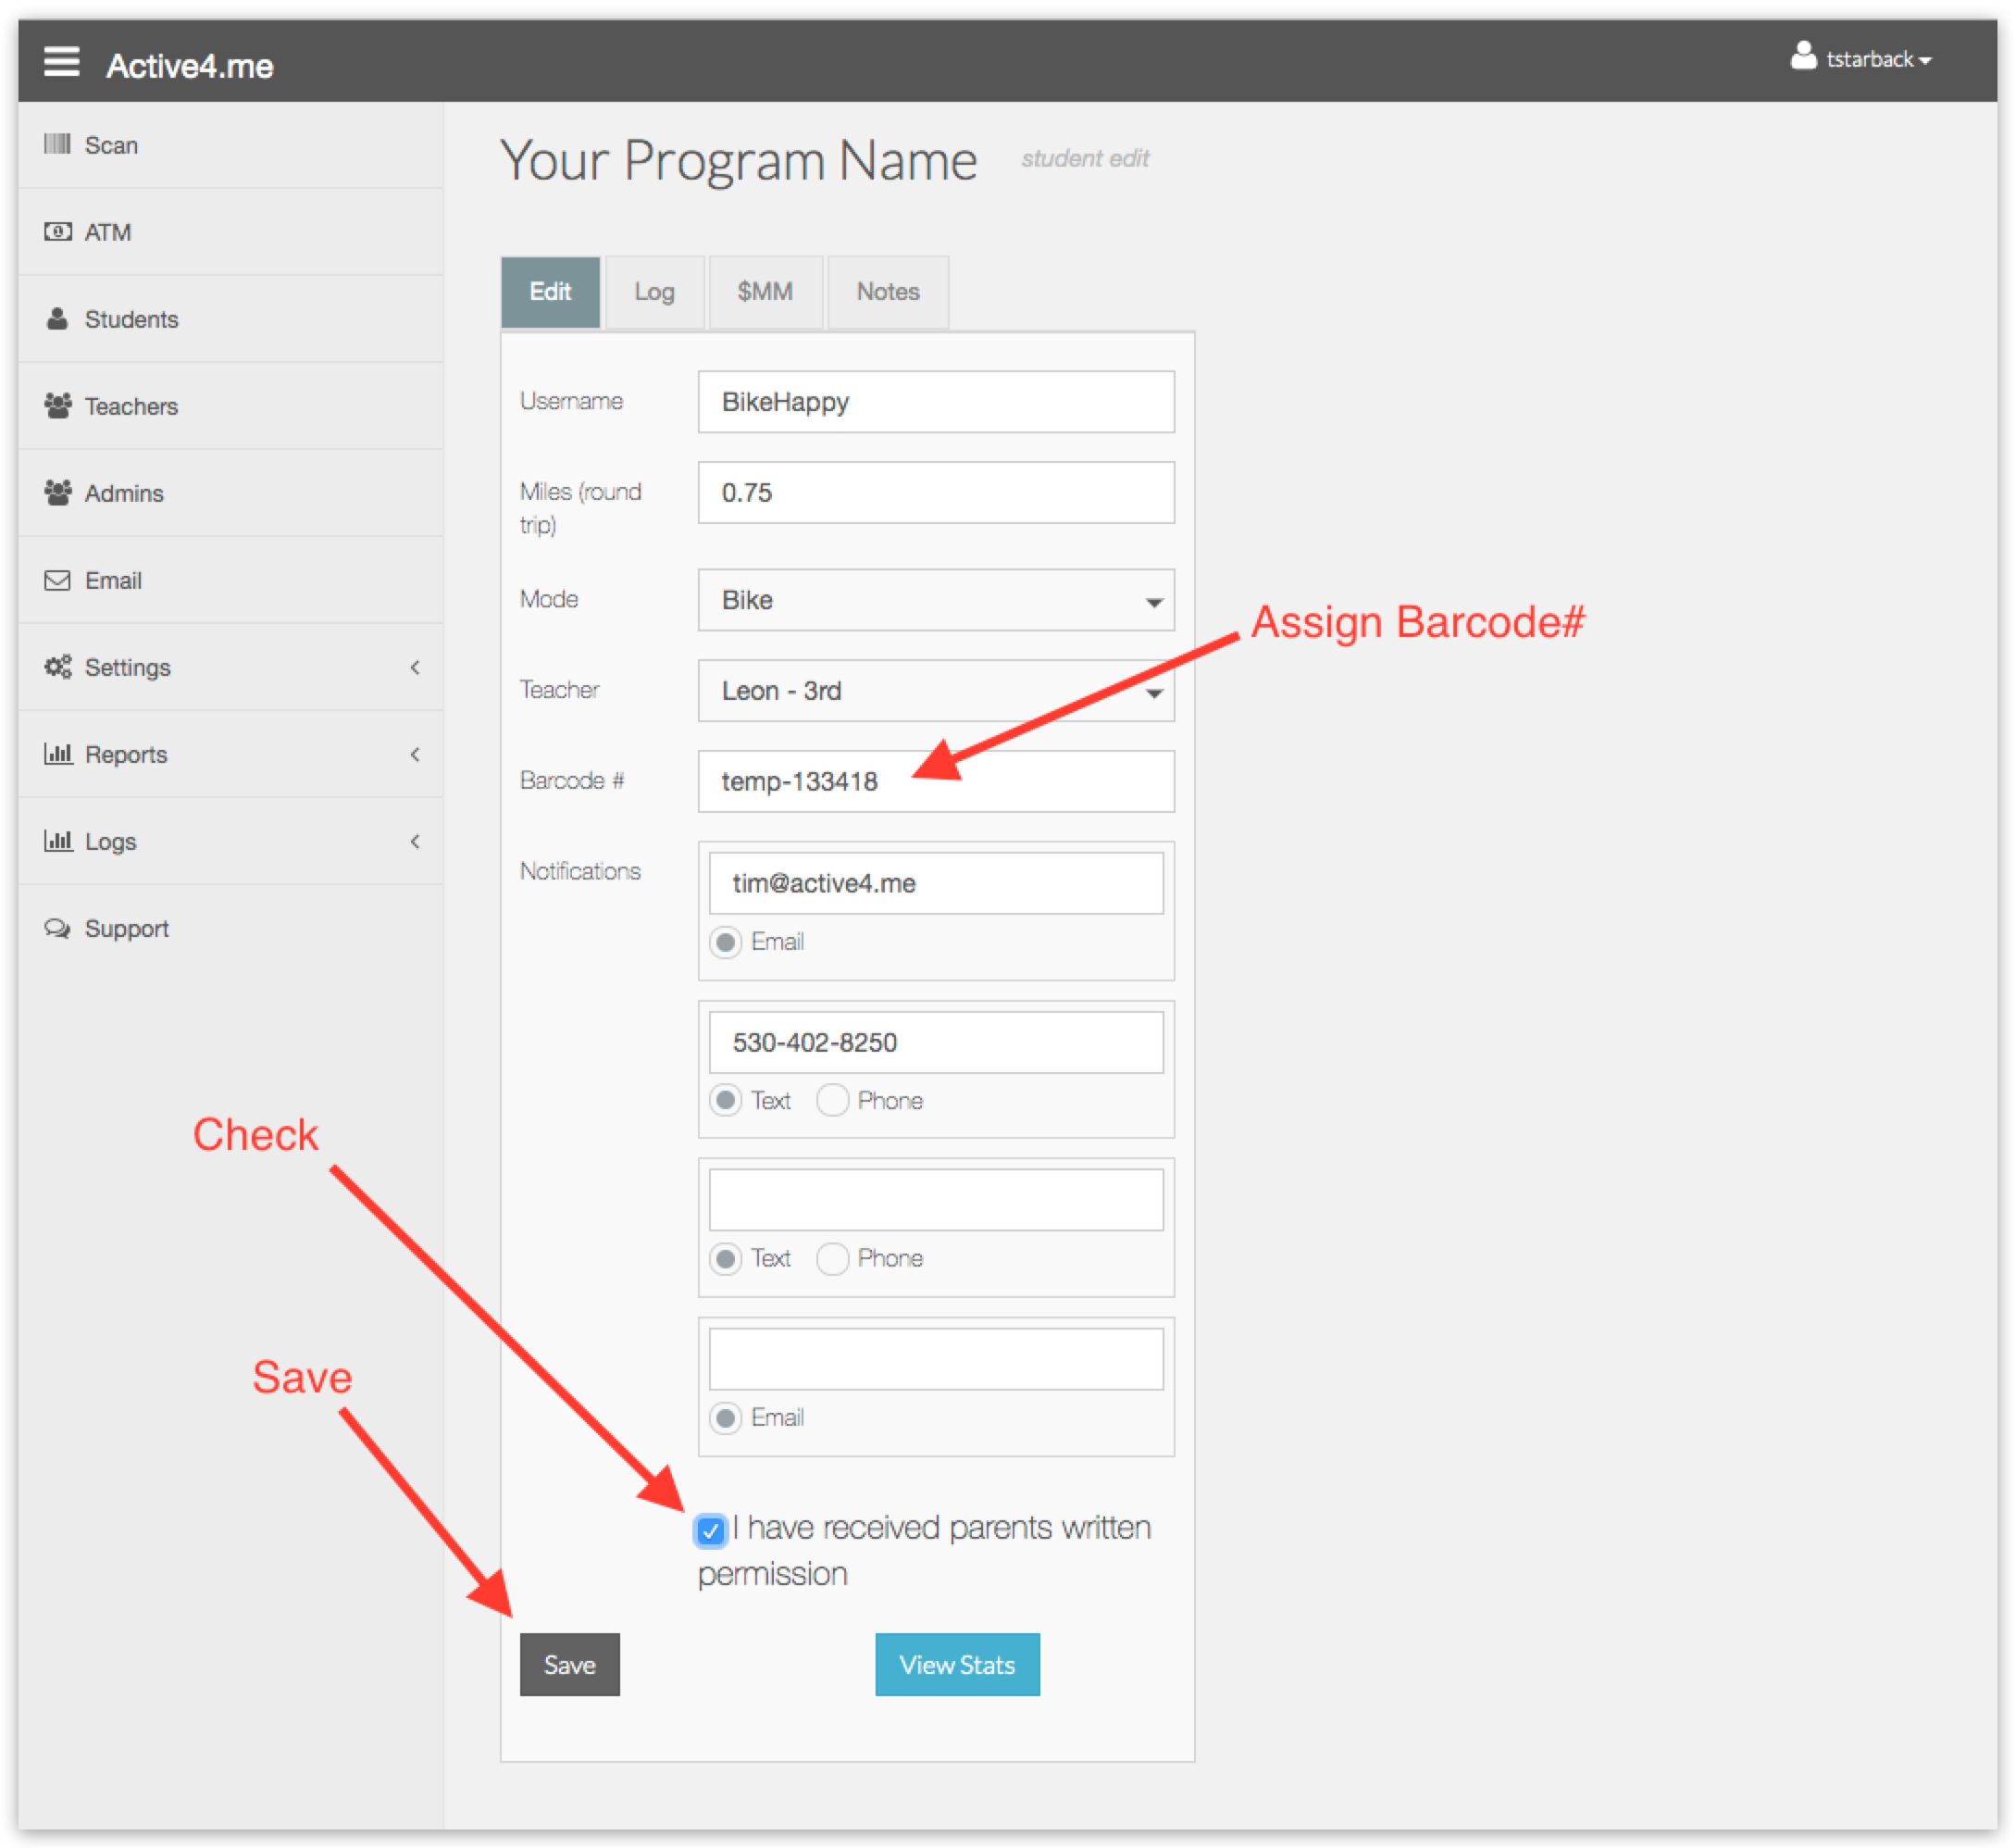
Once the form is received. Search for and click Edit on the student record.
1. Assign them a barcode number.
2. Click the "I have received parents written permission" check box.
3. Click the Save button.
Done! Now the next time that barcode number is scanned it will record the trip and send any notifications.